Specifying and Verifying a Cross-Organizational Business Model in PROTOS v1.0
These instructions were created by Anup Kalia, a PhD student in our
department. Anup is helping informally with this course.
Set the quality to 720p. This demo has a verification process which you don't need for project B2.
Opening Protos Business Modeler
- Log in to VCL. Make a
new reservation by selecting the environment
CSC513_RSA.
- Navigate through the following to open IBM RSA Start->All
Programs->IBM Software Delivery Platform->IBM Rational Software
Architect for WebSphere Software 8.0.1-> IBM Rational Software
Architect for WebSphere Software
- Once the Eclipse-based framework opens, create a new project
File->New->Project
- Make sure you are in the Modelling perspective
- Select General->Project
- Give a project name "ProtosProject" and click Finish
- Right click on the newly created project and select New->Folder
- Give the folder name as "BusinessModel"
- Right click on the folder "BusinessModel" and select New->Other
- From New Window, select Examples->Pmodel Diagram
- Click Next
- In the Create Pmodel Diagram window, you can rename the file by changing default to something you like.
For example, rename <default>.protosmetamodel_diagram to <file name>.protosmetamodel_diagram and then
click Next
- Leave Pmodel Domain Model as it is and click Finish
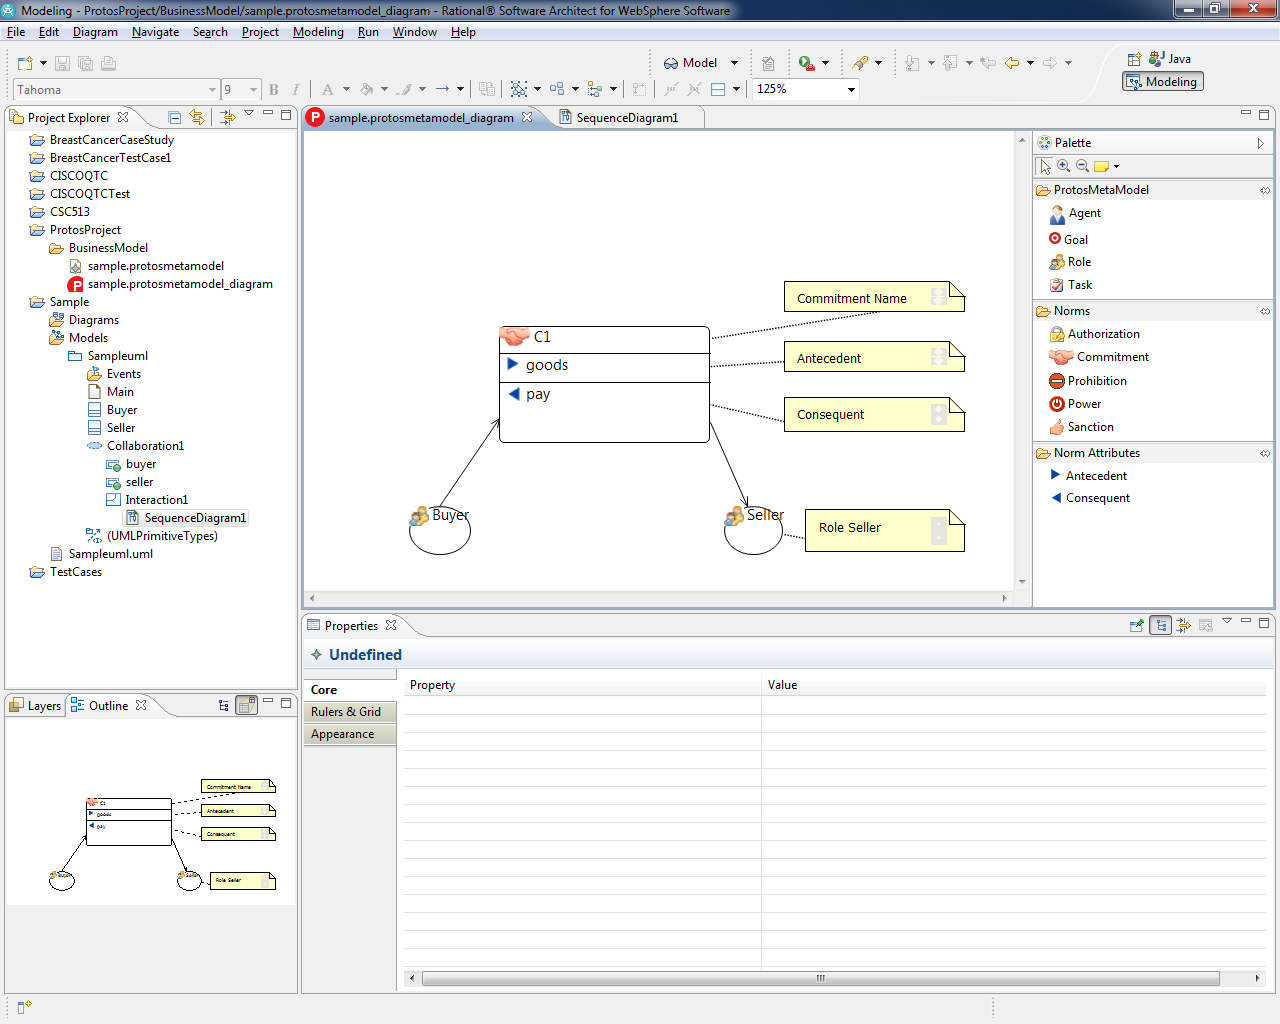
- Now you can see following things
- In the center you will find a Canvas to create a business model
- In the left-hand side you can see 2 files under Business Model folder
- In the right-hand side you can see a Tool Palette with Roles, Commitment, and Commitment Attributes
- In general, the canvas opens when you double-click on <file name>.protosmetamodel_diagram
Creating a Protos Business Model
- Create a Role Buyer
- Left-click on the Role icon shown in the Tool Palette
- Again left-click and drop it on the Canvas
- Rename the Role as "Buyer". Use F2 (windows, linux) and Enter (Mac) for renaming the icon
- Similarly, create a Role Seller
- Create a Commitment
- Drag a Commitment icon onto the Canvas similar to the Role icon
- Rename it to a Commitment name. For example, C1
- You can expand the icon by stretching it vertically or horizontally
- Drag Antecedent on to the Commitment icon and name it as "goods"
- Drag Consequent on to the Commitment icon and name it as "pay"
- We consider here that a commitment is directed from the Buyer to the Seller. Hence, from the Buyer stretch an arrow to the Commitment C1 and again from the Commitment C1, stretch an arrow to the Seller
- Export the project by right clicking on the BusinessModel folder
and select General->Archive File
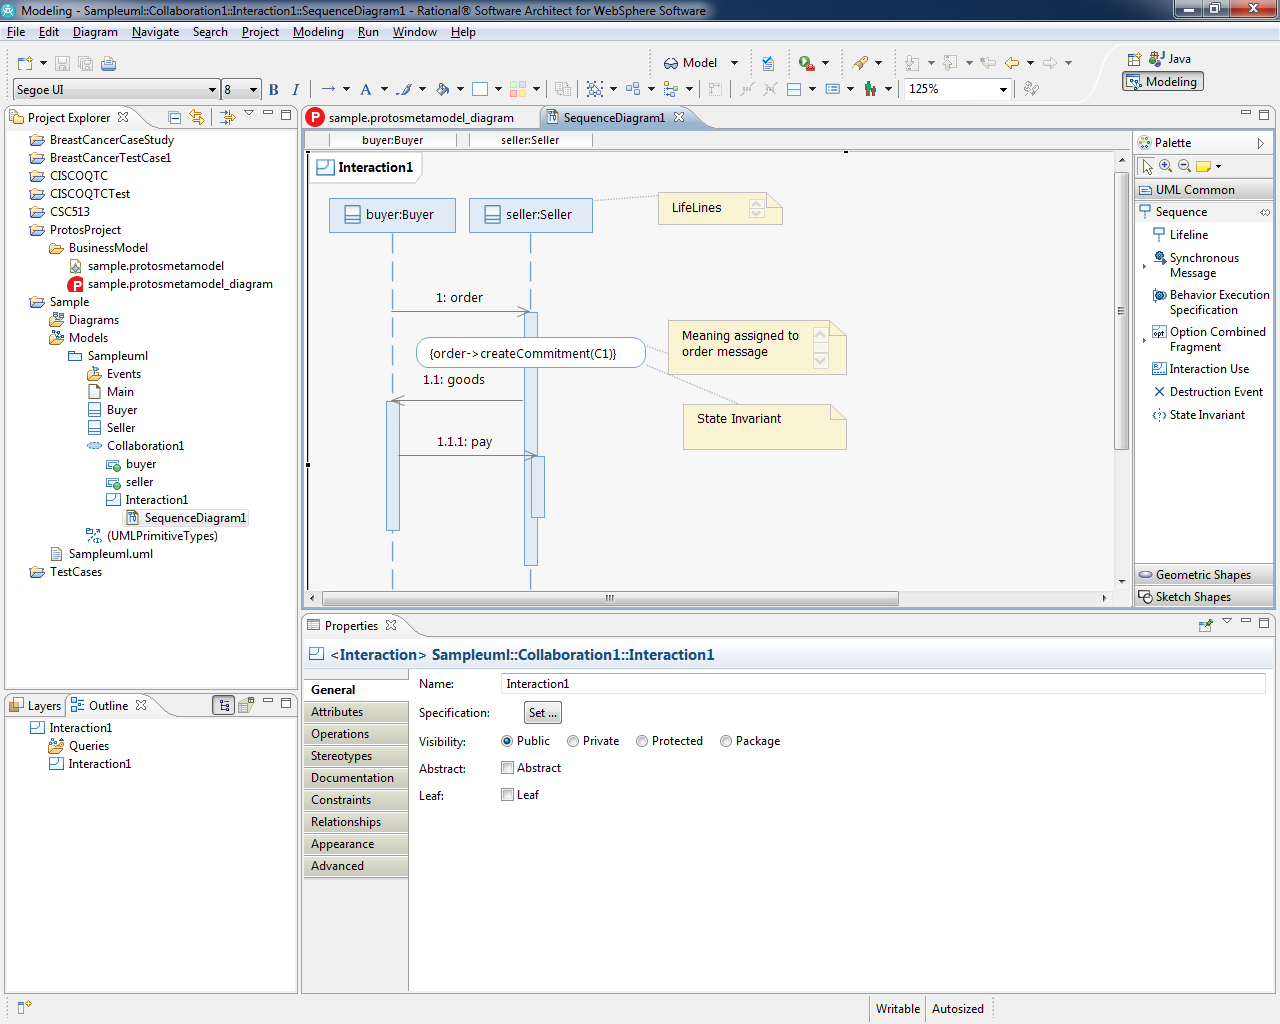
Creating an Operational Model or UML sequence diagrams
- Instructions for creating a sequence diagram is same to the previous project B1
- Create a Modeling Project CSC513_ProtosTestCase1
- However, in addition to creating a message in a sequence diagram, you have to add a meaning to the message
- Create two Lifelines. One a Buyer and second a Seller
- Create an order message from the Buyer to the Seller
- Drag a State invariant from the Tool Palette and drop it onto the Seller Lifeline
- Rename the State invariant as order->createCommitment(C1)
- Create a goods message from the Seller to the Buyer
- Create a pay message from the Buyer to the Seller
- Export the project by right clicking on the project name
and selecting CSC513_ProtosTestCase1->Export